How Do You Change a Wiper Reservoir on Your Vehicle
A failing wiper reservoir can leave you without washer fluid when you need it most. Changing a wiper reservoir is a straightforward DIY job that saves you time and money. This guide walks you through every step, from identifying the problem to completing the replacement with confidence.
Your windshield washer system plays a big role in keeping you safe on the road. When dirt, bugs, or debris smear across your windshield, you rely on clean washer fluid to clear your view. But what happens when that fluid stops spraying? Often, the culprit is a worn or cracked wiper reservoir. Changing a wiper reservoir might sound intimidating, but it is one of the simplest maintenance jobs you can do at home. In this guide, we break down everything you need to know, from spotting the warning signs to finishing the replacement like a pro.
Many car owners ignore their windshield wiper fluid system until something goes wrong. By then, a small crack or a failed pump can turn a five-minute job into a frustrating experience. Whether you drive a sedan, SUV, or truck, the process is similar across most vehicles. This article gives you all the details you need to tackle the job with confidence. Let us walk you through it step by step.
Key Takeaways
- Know the signs: Recognizing early symptoms of a failing wiper reservoir prevents bigger problems.
- Gather your tools first: Having everything ready makes the process smooth and fast.
- Follow each step carefully: Rushing can lead to leaks or improper installation.
- Avoid common mistakes: Skipping steps or using wrong parts causes repeated repairs.
- Maintain your system: Regular care extends the life of your new wiper reservoir.
- Safety matters: Always work in a safe environment and let the engine cool.
- Know when to call a pro: Some situations need professional help.
📑 Table of Contents
- What Is a Wiper Reservoir and Why Does It Matter?
- Signs Your Wiper Reservoir Needs Replacement
- Tools and Materials You Will Need
- Step-by-Step Guide to Changing a Wiper Reservoir
- Common Mistakes to Avoid When Replacing a Wiper Reservoir
- Expert Tips for Maintaining Your Wiper System
- When Should You Call a Professional?
- How Much Does It Cost to Replace a Wiper Reservoir?
- Key Takeaways
What Is a Wiper Reservoir and Why Does It Matter?
The wiper reservoir is the plastic tank that holds your washer fluid. It connects to hoses that carry fluid up to the windshield washer nozzle on your hood or windshield. When you pull the lever on your steering column, a small pump pushes fluid through those hoses and sprays it onto your glass.
Without a working wiper reservoir, your windshield cleaning system cannot function. This means your visibility drops fast in rain, snow, or dusty conditions. Most reservoirs sit behind the front bumper or near the fender. They are exposed to road debris, extreme temperatures, and vibration. Over time, plastic cracks, hoses loosen, and connections wear out.
Keeping your car fluid levels healthy is part of basic vehicle maintenance. The reservoir itself has a lifespan, but it can last many years with proper care. Understanding how it works helps you spot problems early. That way, you fix small issues before they become expensive repairs.
How the Wiper Reservoir System Works
The system is simple. Fluid sits in the tank. A pump sits at the bottom of the tank. When you activate the washer, the pump sends fluid through a hose to the nozzle. The nozzle sprays the fluid onto your windshield. After you release the lever, the pump stops and the system resets.
Most vehicles have one reservoir for the front washer. Some models also have a rear reservoir for back windshield cleaning. The tank typically holds between one and two liters of fluid. You can refill it with standard windshield washer fluid from any auto parts store.
Signs Your Wiper Reservoir Needs Replacement
Catching a failing reservoir early saves you from a messy and potentially dangerous situation on the road. Here are the most common signs that your wiper reservoir needs attention.
- Cracks or splits in the tank: Visible damage is the clearest sign. Check the tank for hairline cracks, especially near the connections.
- Fluid leaks under the front of your car: Puddles of colored fluid near the bumper often point to a cracked reservoir.
- Washer fluid stops spraying: If you hear the pump running but no fluid comes out, the tank may be empty or the lines could be blocked from a crack.
- Low fluid level that keeps dropping: A reservoir that loses fluid without any use suggests a slow leak.
- Unusual smells or discoloration: Old or contaminated fluid can signal that the reservoir material is breaking down.
- Wiper fluid warning light on your dashboard: Some vehicles have a sensor that triggers a warning when fluid is low. If the light stays on even after refilling, the sensor or reservoir may be faulty. You can learn more about running diagnostics without a check engine light to better understand your vehicle’s warning systems.
Do not ignore these signs. A small leak today can become a total system failure tomorrow. Addressing the problem quickly keeps your windshield visibility sharp and your driving safe.
Tools and Materials You Will Need
Before you start, gather everything you need. Having the right tools on hand makes the job faster and prevents frustration. Here is a simple list.
- Replacement wiper reservoir (match the part to your vehicle make and model)
- New washer fluid (to refill after installation)
- Screwdriver set (flathead and Phillips)
- Pliers or a wrench set
- Rags or paper towels
- Safety gloves
- A helper or jack stand if the reservoir is hard to reach
You do not need special tools for most replacements. A basic do it yourself car maintenance toolkit handles the job. If you are unsure about the right reservoir for your vehicle, check your owner’s manual or ask at your local auto parts store. Some people also find it helpful to look up how to change windshield wipers for related guidance on front-end components.
Make sure you buy a reservoir that matches your vehicle year, make, and model. Universal reservoirs exist, but a direct-fit part installs much easier and seals better. Taking five minutes to verify the part saves a lot of headaches later.
Step-by-Step Guide to Changing a Wiper Reservoir
Now let us get into the hands-on part. Follow these steps carefully, and you will have a new wiper reservoir installed in under 30 minutes.
Step 1: Prepare Your Vehicle
Start by parking your car on a flat surface. Turn off the engine and let it cool completely. Engage the parking brake so the vehicle does not move while you work. If you need to access the reservoir from underneath, use jack stands for safety. Never work under a car supported only by a jack.
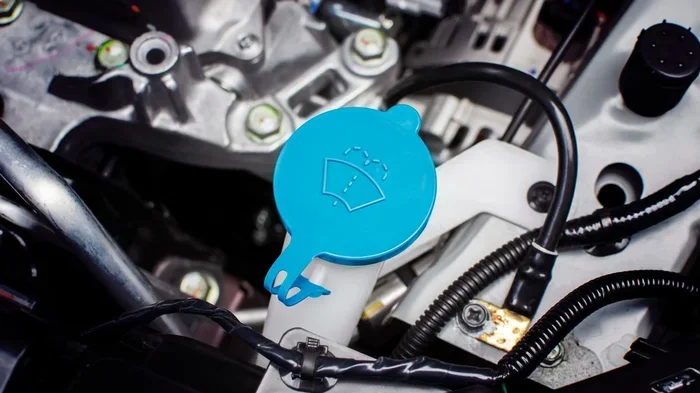
Locate the current reservoir. On most vehicles, it sits behind the front bumper on the driver side. Pop the hood and check the cap on top of the tank. This gives you a general idea of where the tank is positioned underneath.
Step 2: Drain the Remaining Fluid
Before disconnecting anything, let the remaining fluid drain out. Place a rag or shallow pan under the tank to catch any spillage. Remove the cap from the reservoir and let gravity do the work. If the fluid is frozen (in cold climates), wait until it thaws before proceeding.
Dispose of old washer fluid properly. Many auto parts stores accept used fluid for recycling. Do not pour it down a storm drain or on the ground.
Step 3: Disconnect the Hoses and Electrical Connections
Follow the hoses from the nozzle back to the tank. Use pliers or your hands to gently squeeze the hose clamps and pull the hoses off the connections. Work slowly to avoid cracking any fittings.
If your vehicle has a pump with an electrical connector, unplug it carefully. Note how everything is connected before you disconnect it. Taking a photo with your phone helps a lot during reassembly.
Step 4: Remove the Old Reservoir
Unbolt or unclip the reservoir from its mounting bracket. Most tanks are held in place by one or two bolts or plastic clips. Carefully pull the old reservoir out of its position. Set it aside and clean the mounting area with a rag.
Inspect the surrounding area for any damage or debris that might have contributed to the old reservoir failing. Cleaning the area before installing the new part promotes a better seal.
Step 5: Install the New Reservoir
Position the new wiper reservoir in the same spot as the old one. Secure it with the bolts or clips you removed earlier. Make sure the tank sits firmly and does not wobble.
Reconnect the hoses, making sure each one clicks or tightens into place. Reattach the electrical connector for the pump. Double-check every connection. A loose hose here leads to a leak later.
Step 6: Refill and Test
Fill the new reservoir with fresh windshield washer fluid. Replace the cap. Turn the ignition to the accessory position and activate the washer. Check that fluid sprays evenly from the nozzle.
Look under the car for any leaks. Run the washer for a few seconds and inspect every connection point. If everything looks dry and the spray pattern is strong, you are done.
Step 7: Clean Up and Dispose of Materials
Wipe down any spilled fluid with a rag. Pack up your old reservoir and tools. Properly dispose of the old washer fluid and the damaged tank. Wash your hands thoroughly after handling any automotive fluids.
Common Mistakes to Avoid When Replacing a Wiper Reservoir
Even simple jobs come with pitfalls. Here are the most common mistakes people make when replacing a wiper reservoir.
- Buying the wrong part: Not all reservoirs are the same. Always confirm the part number matches your vehicle.
- Forgetting to drain the fluid first: Spilling washer fluid everywhere makes a mess and wastes product.
- Over-tightening hose clamps: This cracks plastic fittings and creates new leaks.
- Skipping the electrical connector check: If the pump stops working, the fluid will not spray even with a new tank.
- Not testing before finishing: Always run the system after installation. Catching a problem now saves you from pulling the car back out later.
- Ignoring related components: While you are under there, check the windshield washer nozzle for clogs. Clean any debris from the nozzle holes. If you have been dealing with noisy wipers or blade issues, you might also want to check whether you can replace just the rubber wiper blade instead of buying a whole new assembly.
Taking your time and avoiding these mistakes leads to a clean, leak-free installation. Patience pays off with a job done right the first time.
Expert Tips for Maintaining Your Wiper System
Replacing the reservoir is one part of the equation. Keeping the entire wiper system in good shape prevents future problems. Here are some expert-backed tips.
Use quality washer fluid. Cheap fluid can leave residue that clogs lines and damages the pump. In winter, always use freeze-resistant washer fluid rated for cold temperatures. Regular fluid freezes in the reservoir and can crack the tank.
Check fluid levels monthly. Make it a habit to glance at the reservoir level when you fill up gas. Topping off regularly keeps the pump primed and prevents air from entering the lines.
Clean the nozzles regularly. Dirt and wax buildup can block the spray holes. Use a pin or compressed air to clear any obstructions. A clean nozzle means better coverage and less wasted fluid.
Inspect hoses during oil changes. When you are already under the hood, take a moment to look at the washer hoses. Cracks or soft spots mean it is time for a replacement. Catching a weak hose early prevents a sudden leak.
Run the washer system periodically. Even in dry seasons, running the washer for a few seconds every couple of weeks keeps the pump lubricated and prevents it from seizing up.
Keep the windshield clean. A dirty windshield causes more wear on the wiper system. Regular washing reduces the workload on the pump and reservoir. It also improves your visibility dramatically.
These simple habits add up. A well-maintained windshield cleaning system works reliably when you need it most. And that is exactly when you want it to work.
When Should You Call a Professional?
Most wiper reservoir replacements are DIY-friendly. But some situations call for a professional touch. If the reservoir is deeply buried behind engine components and you cannot reach it safely, a mechanic can handle it. If you notice electrical issues with the pump after replacement, a diagnostic check is wise.
Also, if your vehicle has a complex washer system with heated nozzles or sensors built into the tank, the repair might be more involved. Do not hesitate to seek help if you feel unsure. A professional mechanic can often complete the job quickly and correctly.
How Much Does It Cost to Replace a Wiper Reservoir?
The cost depends on your vehicle and where you buy the parts. A replacement wiper reservoir typically costs between $15 and $50 for the part alone. If you take on the job yourself, that is the only expense. A mechanic might charge $75 to $150 for labor, depending on the vehicle and location.
Compared to the cost of a tow or a trip to the shop for a visibility-related issue, the savings from a DIY replacement are significant. This is one of those car maintenance jobs that pays for itself quickly.
Key Takeaways
- A working wiper reservoir is essential for safe driving. Without it, your windshield cleaning system cannot clear debris from your view.
- Watch for warning signs like cracks, leaks, and spray failure. Catching problems early makes the repair easier.
- Gather your tools and the correct replacement part before starting. Preparation prevents mistakes and delays.
- Follow each step carefully and test the system afterward. A thorough check ensures a leak-free, long-lasting repair.
- Maintain the entire wiper system regularly. Quality fluid, clean nozzles, and periodic inspections keep everything running smoothly.
- Know when to call a professional. Complex setups or uncertainty are valid reasons to seek expert help.
- DIY saves money. A simple reservoir replacement costs very little in parts and no labor if you do it yourself.
Changing a wiper reservoir is one of the most satisfying car maintenance jobs you can do on your own. It takes under 30 minutes, requires basic tools, and delivers immediate results. Once you have done it once, you will feel more confident tackling other DIY repairs. Your vehicle stays in better shape, your wallet stays fuller, and your windshield stays clear. Grab your tools, grab your new reservoir, and get started today.
Take pride in knowing you kept your car running safely and efficiently. A clean windshield means a safer drive for you and everyone around you. That is what good automotive maintenance is all about.
Frequently Asked Questions
How long does it take to change a wiper reservoir?
Most people complete the job in 20 to 30 minutes. The actual time depends on how accessible the reservoir is on your vehicle and whether you have replaced one before. If the tank is easy to reach, it can be even faster.
Can I use water instead of washer fluid in the reservoir?
You can, but it is not recommended. Water does not clean as well as windshield washer fluid and can freeze in cold weather, cracking the reservoir and hoses. Washer fluid also contains detergents that help dissolve bugs and grime more effectively.
How do I know which wiper reservoir fits my vehicle?
Check your owner’s manual for the part number. You can also visit your local auto parts store and provide your vehicle’s year, make, model, and engine size. Many online retailers let you search by vehicle to find the exact fit.
Is it safe to drive with a cracked wiper reservoir?
It is not ideal. A cracked reservoir means you may lose washer fluid unexpectedly, which reduces your ability to clear the windshield in emergencies. Have the reservoir replaced as soon as possible to maintain safe driving conditions.
Can a bad wiper reservoir damage the windshield washer pump?
Yes. If the reservoir runs dry because of a leak, the pump can overheat and burn out. Running the pump without fluid causes friction and heat that damages the motor. Always address a low fluid level promptly.
Do I need to reset anything after replacing the wiper reservoir?
Most vehicles do not require a reset. However, some newer models with fluid level sensors may need a manual reset. Check your owner’s manual for specific instructions. If your vehicle has a warning light, it may turn off automatically after you refill the new reservoir.
=== CONCLUSION ===
Changing a wiper reservoir is a simple, affordable repair that any car owner can handle. You now know the signs of a failing reservoir, the tools you need, and the exact steps to complete the replacement. By maintaining your windshield wiper fluid system and avoiding common mistakes, you keep your vehicle in top shape and your windshield clear in any condition.
Do not wait until your washer fluid stops spraying to take action. Regular inspections and timely replacements keep your car maintenance routine on track. Grab your supplies, follow the steps in this guide, and enjoy the confidence that comes with a job done well. Your windshield and your safety will thank you.


