Common Car Window Tinting Mistakes You Should Avoid
Car window tinting mistakes can cost you money, time, and the look of your vehicle. This guide reveals the most common errors people make, from choosing the wrong tint percentage to skipping curing time. Learn what to avoid and get pro-level results every time.
Car window tinting is one of the best upgrades you can make to your vehicle. It looks sleek, keeps your car cooler, and blocks harmful UV rays. But here is the thing. Many people make mistakes during the tinting process that lead to big problems down the road.
Whether you are a first-timer or have tinted cars before, this guide will help you steer clear of the most common car window tinting mistakes. We will walk you through each error step by step. By the end, you will know exactly how to get a perfect tint job that lasts for years.
So grab a coffee, sit back, and let us dive into the world of car window tinting. You are going to want to remember every single point in this article.
Key Takeaways
- Wrong Tint Percentage: Choosing the wrong darkness level leads to legal trouble and poor visibility.
- Skipping Professional Help: DIY tinting often results in bubbles, peeling, and uneven application.
- Ignoring Local Laws: Tint laws vary by state, and violations mean costly fines.
- Cheap Film Quality: Low-quality tint fades, bubbles, and loses UV protection fast.
- Rushing the Curing Process: Not waiting long enough causes damage and reduces tint lifespan.
- Neglecting Edge Prep: Dirty or wet windows cause poor adhesion and early peeling.
- Overlooking Warranty Terms: Without proper care, your window film warranty becomes worthless.
📑 Table of Contents
- Choosing the Wrong Tint Percentage
- Skipping Professional Installation
- Ignoring Film Quality
- Neglecting Window Preparation
- Rushing the Curing Process
- Overlooking UV Protection and Heat Rejection
- Forgetting About Aftermarket Tint Regulations
- Not Maintaining Your Tint Properly
- The Cost of Ignoring These Mistakes
- How to Choose the Right Tint Installer
- Final Thoughts on Avoiding Tinting Mistakes
Choosing the Wrong Tint Percentage
The tint percentage is the first big decision you make. And getting it wrong can cause real headaches. The percentage refers to how much light the film allows through your windows. A lower number means a darker tint. A higher number means a lighter tint.
Many people pick the darkest tint they can find. They think it looks the coolest. But darker is not always better. Here is why.
Visibility Problems at Night
Dark tints reduce the amount of light coming through your windows. During the day, this might not matter much. But at night or in poor weather, it can seriously affect your visibility. You might struggle to see pedestrians, other cars, or road obstacles. This puts you and others at risk.
Legal Trouble With Tint Laws
Every state has window tint laws that set limits on how dark your tint can be. These rules are called visible light transmission limits, or VLT for short. If your tint is too dark, you can get pulled over and fined. In some cases, you might even be told to remove the tint entirely.
Before you choose a tint percentage, look up your local legal tint limits. Here are some quick tips to stay on the right side of the law.
- Check your state’s Department of Motor Vehicles website for tint regulations.
- Remember that different windows often have different legal limits.
- Medical exemptions exist in some states for darker tints.
- Keep a copy of your tint certificate in the car at all times.
Skipping Professional Installation
DIY window tinting kits are everywhere online. They promise easy application and great results. And yes, they are cheaper than hiring a pro. But the savings often come at a steep price. Many people make the mistake of trying to tint their own windows without experience.
The Bubble Problem
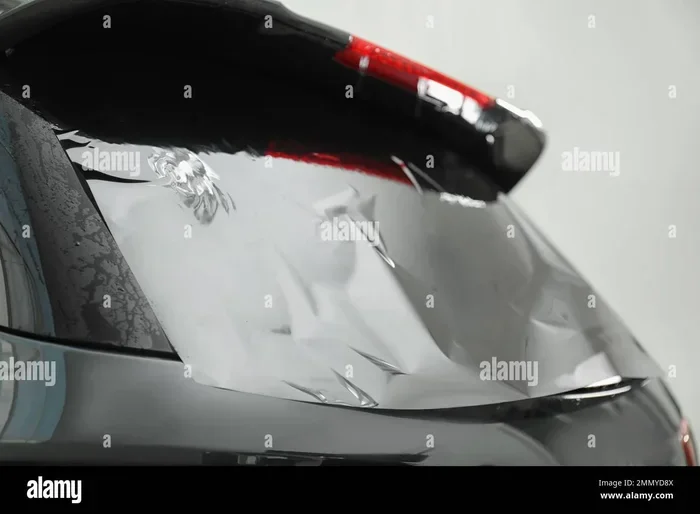
One of the most common DIY tinting errors is tint bubbling. Bubbles form when the film is not applied smoothly. Dust particles, air pockets, and misalignment all contribute to this issue. Small bubbles might seem harmless at first. But over time, they spread and ruin the entire look of your tint.
Uneven Application
Professional installers use specialized tools and techniques. They have experience working with different window shapes and sizes. A DIYer often ends up with crooked edges, loose corners, or wrinkles in the film. These flaws are not just ugly. They also affect how well the tint performs.
Wasted Money
Think about it. A cheap tint kit might cost 50 to 100 dollars. But if it goes wrong, you have to pay for removal and reapplication. Professional installation might cost a few hundred dollars more. But it saves you from the frustration of redoing the job. The long-term savings are well worth it.
Quick Tip: If you must DIY, watch several tutorial videos first. Invest in a quality application kit. And always work in a dust-free environment with plenty of light.
Ignoring Film Quality
Not all car window film is created equal. This is a mistake that costs people a lot of money over time. Cheap tint might look fine at first. But it fades, peels, and deteriorates much faster than quality film.
Metalized vs. Dyed vs. Ceramic Film
There are several types of window tint film on the market. Each one has different properties and performance levels.
- Dyed Film: The most affordable option. It blocks some heat but fades over time. It also offers minimal UV protection.
- Metalized Film: Contains tiny metal particles that reflect heat. It is more durable than dyed film but can interfere with cell signals.
- Carbon Film: Offers excellent heat rejection without signal interference. It does not fade as easily as dyed film.
- Ceramic Film: The top-of-the-line option. It provides the best heat rejection, UV protection, and clarity. It is also the most expensive.
Why Cheap Film Fails
Low-quality tint often uses inferior adhesive. This adhesive breaks down quickly when exposed to sunlight. You will notice tint peeling at the edges within months. The color may also shift or bubble. In the end, you are stuck removing the bad tint and starting over.
Quick Tip: Always ask about the window film warranty before you buy. Quality tint brands offer warranties that cover bubbling, peeling, and fading for several years.
Neglecting Window Preparation
Clean windows are the foundation of a great tint job. But this step is often rushed or skipped entirely. If your windows are not perfectly clean before application, the tint will not stick properly.
The Dirt and Grease Problem
Your windows collect oils, dust, and residue every single day. Even if they look clean, there is likely a thin film of grime on the surface. This prevents the tint adhesive from bonding correctly. The result is early peeling and poor adhesion.
How to Properly Prep Your Windows
Professional installers use a rigorous cleaning process. They often use a razor blade to remove all traces of old adhesive and residue. At home, you can follow these steps.
- Wash each window thoroughly with glass cleaner.
- Use a lint-free cloth to dry the surface completely.
- Wipe down the glass with an alcohol-based solution to remove oils.
- Inspect each window under bright light for any remaining spots.
- Repeat the cleaning process if needed.
Taking the time to prep your windows properly makes a huge difference. It is one of those steps that separates a good tint job from a great one.
Rushing the Curing Process
After your tint is applied, it needs time to cure. This is the process where the adhesive fully bonds to the glass. Many people make the mistake of rolling down their windows or wiping the glass too soon. This can shift the film and create wrinkles or gaps.
How Long Should You Wait?
The curing time depends on several factors. These include the type of film used, the weather conditions, and the humidity level. As a general rule, you should wait at least three to five days before rolling down your windows. In colder or more humid conditions, wait up to two weeks.
Signs the Tint Is Not Cured Properly
Watch for these warning signs after your tint is applied.
- Water spots or haze inside the film.
- Edges that feel loose or lifted.
- Visible wrinkles or creases in the film.
- Foggy appearance that does not clear over time.
If you notice any of these issues, contact your installer right away. Early intervention can often fix the problem before it gets worse.
Expert Insight: Heat and sunlight actually help the curing process. Parking your car in direct sunlight for the first few days can speed things up. Just make sure you do not open the windows during this period.
Overlooking UV Protection and Heat Rejection
One of the main reasons people tint their windows is for UV protection and heat rejection. But not all tint films perform equally in these areas. Choosing the wrong film means you miss out on the real benefits of window tinting.
Why UV Protection Matters
The sun emits harmful ultraviolet rays that can damage your skin and your car’s interior. Over time, UV exposure fades your dashboard, seats, and steering wheel. It can also increase your risk of skin cancer. A good quality tint blocks up to 99 percent of UV rays. This protects both you and your vehicle.
Heat Rejection: Staying Cool on Hot Days
Anyone who has sat in a hot car knows the struggle. Heat rejection film can reduce the interior temperature significantly. This means less reliance on your air conditioning. It also protects your car’s electronics and upholstery from heat damage.
When choosing your tint, ask the installer about the film’s heat rejection rate and UV blocking capability. These numbers tell you exactly how well the film will perform.
Glare Reduction: A Bonus Benefit
Another often overlooked benefit of quality tint is glare reduction. Glare from the sun and other vehicles can be distracting and dangerous. A good tint film reduces glare significantly, making your driving experience safer and more comfortable.
Forgetting About Aftermarket Tint Regulations
If your car did not come with tinted windows from the factory, you need to be extra careful. Aftermarket tint is subject to different rules than factory tint in many states. Some vehicles come with privacy glass from the manufacturer. This glass often has a different legal status than added tint film.
Factory vs. Aftermarket Tint
Factory tint is usually applied during the manufacturing process. It is often a lighter shade than aftermarket tint. Many states treat factory tint differently when it comes to legal limits. Aftermarket tint, on the other hand, is measured by its VLT percentage regardless of the original glass.
What You Need to Know
- Check if your state distinguishes between factory and aftermarket tint.
- Keep all receipts and documentation from your tint installation.
- Some states require a sticker on the windshield to identify legal tint.
- Medical exemptions may allow darker aftermarket tint in certain states.
Understanding these rules before you tint your car saves you from unnecessary fines and legal headaches. When in doubt, consult a local tint shop that knows the regulations in your area.
Not Maintaining Your Tint Properly
Getting your tint installed is only half the battle. Proper maintenance ensures your tint looks great and performs well for years. Many people damage their tint without even realizing it.
Common Maintenance Mistakes
Here are the things you should avoid after your tint is applied.
- Using abrasive cleaners or rough cloths on your tinted windows.
- Rolling down your windows before the curing period is complete.
- Hanging sharp objects or air fresheners that scratch the film.
- Using high-pressure washers directly on tinted windows.
- Ignoring small bubbles or edges that start to lift.
How to Clean Tinted Windows
Cleaning tinted windows requires a gentle approach. Use a soft microfiber cloth and a ammonia-free glass cleaner. Avoid any products that contain harsh chemicals. Wipe in gentle circular motions without applying too much pressure. With proper care, your tint can last five to ten years or even longer.
Quick Tip: Wait at least 30 days after installation before cleaning your tinted windows for the first time. This gives the adhesive enough time to fully set.
The Cost of Ignoring These Mistakes
You might be thinking, “How bad can these mistakes really be?” The truth is, they can be surprisingly costly. Let us break down the potential costs of ignoring proper tinting practices.
| Mistake | Potential Cost | Impact |
|---|---|---|
| Wrong tint percentage | 50 to 200 dollars in fines | Legal issues and forced removal |
| DIY installation failure | 100 to 400 dollars in removal and redo | Wasted time and frustration |
| Cheap film quality | 150 to 500 dollars in early replacement | Poor performance and appearance |
| Rushing the cure process | 50 to 200 dollars in repair | Wrinkles, peeling, and adhesion failure |
| Ignoring maintenance | 200 to 600 dollars in early replacement | Reduced UV protection and appearance |
As you can see, the costs add up quickly. Investing a little extra time and money upfront prevents all of these problems. A proper window tinting job is an investment in your vehicle and your comfort.
How to Choose the Right Tint Installer
Finding a reliable tint installer is one of the most important decisions you make. A good installer can make the difference between a flawless job and a disaster. Here is what to look for.
- Experience: Choose an installer with years of experience and a strong portfolio.
- Reviews: Check online reviews and ratings from previous customers.
- Warranty: A reputable installer offers clear warranty terms on both materials and labor.
- Film Selection: The best shops carry multiple brands and film types to suit your needs.
- Clean Workspace: A clean, professional installation space shows attention to detail.
Do not be afraid to ask questions before you commit. A good installer will happily explain their process, the films they use, and what you can expect. If an installer seems rushed or dismissive, that is a red flag.
Final Thoughts on Avoiding Tinting Mistakes
Car window tinting is a fantastic upgrade when done right. It enhances the look of your vehicle, protects your interior, and keeps you more comfortable on the road. But the process requires careful thought and attention to detail.
By avoiding these common car window tinting mistakes, you set yourself up for success. Choose the right tint percentage for your needs and your local laws. Invest in quality film and professional installation. Prep your windows properly. Respect the curing process. And maintain your tint with care over the years.
Every step matters. Skipping even one of them can lead to problems that cost you time, money, and frustration. Take the time to do it right the first time. Your car and your wallet will thank you.
Now that you know what to avoid, you are well-equipped to make smart decisions about your next car window tinting project. Share this guide with friends who are considering tinting their windows. And remember, a little knowledge goes a long way toward getting the perfect tint.
Frequently Asked Questions
What is the best tint percentage for front side windows?
Most states allow a tint percentage between 35 and 50 percent on front side windows. This range offers a good balance between style, UV protection, and visibility. Check your local window tint laws to confirm the legal limit in your area.
How long does car window tint take to fully cure?
Typically, car window tint takes between three days and two weeks to fully cure. The exact time depends on the film type, weather conditions, and humidity. Avoid rolling down your windows during this period to prevent damage.
Can I tint my car windows myself?
Yes, you can DIY your window tinting project. However, professional installation almost always produces better results. DIY kits are more prone to bubbles, peeling, and uneven application. If you choose DIY, invest time in learning the proper technique.
Does window tint fade over time?
Lower-quality tint films do fade over time, especially those with dye-based layers. High-quality window tint film such as ceramic or carbon options resists fading much better. Always check the window film warranty to understand what is covered.
Is it illegal to have tinted front windshield?
In most states, tinting the front windshield is illegal or heavily restricted. Some states allow a small tinted strip at the top of the windshield, known as an ash visor. Always verify your local legal tint limits before applying any film.
What should I do if my tint starts bubbling?
Small bubbles may disappear as the tint fully cures. If bubbles persist after two weeks, contact your installer. Bubbles that appear months later usually indicate poor film quality or adhesive failure. A good window film warranty will cover replacement in these cases.
=== CONCLUSION ===
Car window tinting mistakes to avoid are more common than you might think. From picking the wrong tint percentage to rushing the curing process, each mistake can lead to costly and frustrating results. The good news is that with the right knowledge, you can avoid all of them.
Take the time to research your options. Choose quality film. Hire a professional installer. Follow the curing and maintenance guidelines. Your car window tinting investment will reward you with better comfort, enhanced appearance, and long-lasting performance.
Now go out there and get that perfect tint for your car. You have got this.