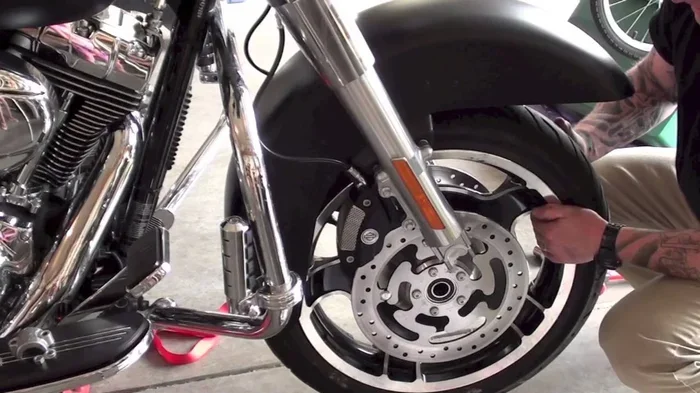
Harley-Davidson Fork Lock Replacement Guide Made Easy
This Harley-Davidson Fork Lock Replacement Guide walks you through everything you need to know. You will learn how to spot a failing fork lock, gather the right tools, and complete the swap in under an hour. Fork lock replacement keeps your motorcycle secure and your ride worry-free. Follow our simple steps and save money on shop visits.
Riding a Harley-Davidson is more than a commute. It is a lifestyle. But even the best bikes need basic maintenance. One part riders often overlook is the fork lock. This small but critical component keeps your steering locked when you park. When it fails, it can leave your motorcycle vulnerable. Our Harley-Davidson Fork Lock Replacement Guide makes the process simple and stress-free.
Whether you are a seasoned mechanic or a first-time DIYer, this guide has you covered. We break down every step in plain language. You will learn what a fork lock does, why it fails, and exactly how to replace it. No guesswork. No confusing jargon. Just clear instructions that get the job done right.
Key Takeaways
- Spotting the signs early: A stiff or stuck steering lock is the #1 warning that your fork lock needs attention.
- You can do it yourself: With basic tools and our guide, most riders finish the job in under an hour.
- OEM vs aftermarket parts: Both options work, but OEM parts offer the best fit and finish for Harley models.
- Common mistakes cost time and money: Avoid cross-threading and skipping the lock cylinder test.
- Maintenance extends life: Regular lubrication and inspection keep your new fork lock working smoothly for years.
- Security matters: A working fork lock is your first line of defense against theft.
📑 Table of Contents
- What Is a Harley-Davidson Fork Lock and Why Does It Matter?
- Signs Your Fork Lock Needs Replacement
- Tools and Parts You Will Need
- Step-by-Step Fork Lock Replacement Process
- Common Mistakes to Avoid During Fork Lock Replacement
- Maintaining Your New Fork Lock for Longevity
- Frequently Asked Questions
- Conclusion
What Is a Harley-Davidson Fork Lock and Why Does It Matter?
The fork lock is a security device built into your Harley’s steering column. It prevents the front wheel from turning when the ignition is off. Most riders know it as the part that clicks when you turn the key. Inside the fork lock cylinder, a series of pins align with your key to engage or release the lock.
Why does this matter so much? Motorcycle theft is a real problem. A working steering lock is your first line of defense. Without it, anyone can steer your bike onto a truck in seconds. The fork lock also protects the steering head bearings from accidental movement when parked.
On Harley-Davidson models, the fork lock integrates with the ignition switch. When you remove the key, the lock engages automatically. This Harley security feature has been standard for decades. It is simple, effective, and easy to maintain.
How the Fork Lock Mechanism Works
The mechanism is straightforward. When you insert your lock key and turn it, the cylinder rotates. This rotation moves a bolt inside the fork assembly. The bolt slides into a slot on the lower fork tube. Once locked, the steering column cannot turn. When you unlock it with the key, the bolt retracts and the steering moves freely again.
Over time, the pins inside the cylinder wear down. Dirt and moisture can also cause corrosion. This leads to a stiff or jammed lock. That is when replacement becomes necessary.
Signs Your Fork Lock Needs Replacement
Catching a failing fork lock early saves you headaches. Here are the most common signs your fork lock cylinder needs attention.
- Stiff or sticky steering lock: If the lock feels rough when you turn the key, the cylinder is wearing out.
- Key won’t turn smoothly: A key that sticks or requires force signals internal pin damage.
- Lock won’t engage fully: When the steering doesn’t lock all the way, the bolt mechanism is worn.
- Visible rust or corrosion: Surface rust around the lock cylinder means moisture has gotten inside.
- Key feels loose in the cylinder: A wobbly key suggests the cylinder is eroding from the inside.
- Steering moves when locked: This is a serious sign. The lock bolt may have broken or worn down.
Ignoring these signs can lead to a broken lock entirely. A broken fork lock means your motorcycle has no steering security. That is an open invitation for thieves. Address these symptoms early with a lock replacement.
When to Replace vs. When to Repair
Not every fork lock issue requires full replacement. Minor sticking can sometimes be fixed with a penetrating lubricant like WD-40. Spray it into the cylinder and work the key back and forth gently. If that solves the problem, you saved yourself some time and money.
However, if the cylinder is physically damaged, the key breaks inside, or the lock bolt is worn, replacement is the only real option. Trying to repair a damaged cylinder often leads to more problems. A full fork lock replacement gives you a fresh start and better motorcycle security.
Tools and Parts You Will Need
Before you start, gather everything you need. Having the right tools makes the job fast and frustration-free. Here is your complete checklist.
Required Tools
- Phillips and flathead screwdrivers in various sizes
- Allen key set (metric)
- Needle-nose pliers
- Rubber mallet or soft hammer
- penetrating lubricant spray
- Clean rags and shop towels
- Wire brush for corrosion removal
- Safety glasses and gloves
Parts and Components
You will need the right fork lock cylinder for your specific Harley model. OEM Harley parts are recommended because they match your bike exactly. Aftermarket options also work well and often cost less. Here are the main parts you need.
- New fork lock cylinder: Choose OEM or a reputable aftermarket brand.
- New lock key: Most replacements come with a matching key set.
- Thread locker compound: Helps secure bolts and prevent loosening over time.
- Dielectric grease: Protects the cylinder from moisture and ensures smooth operation.
OEM vs Aftermarket Fork Lock Cylinders
OEM Harley parts are made by the manufacturer. They fit perfectly and come with a warranty. Aftermarket cylinders from brands like Kuryakyn or Vortex offer similar quality at lower prices. Both options are solid choices. Check your owner’s manual to confirm the correct part number for your model year.
| Feature | OEM Fork Lock | Aftermarket Fork Lock |
|---|---|---|
| Fit and finish | Perfect factory match | Very good, minor variations |
| Price range | $40-$80 | $25-$60 |
| Warranty | Yes, included | Varies by brand |
| Availability | Dealer or online | Widely available online |
| Key matching | Guaranteed | Usually matches OEM |
Step-by-Step Fork Lock Replacement Process
Now let’s get into the actual work. This Harley-Davidson Fork Lock Replacement Guide walks you through each step clearly. Follow them in order for the best results.
Step 1: Prepare Your Motorcycle
Start by parking your Harley on a flat, stable surface. Turn off the ignition and remove the key. Let the engine cool completely if you have been riding. Put on your safety glasses and gloves before you begin any work.
Next, locate the fork lock cylinder. On most Harley models, it sits on the right side of the steering head, just below the handlebars. You may need to remove the side cover or fairing to access it fully. Take photos before removing any panels so you can reassemble everything correctly.
Step 2: Remove the Old Fork Lock Cylinder
Use your Allen keys to loosen the mounting bolts holding the cylinder in place. Most Harley models use two or three bolts around the cylinder housing. Keep these bolts in a safe spot. You do not want to lose them.
Once the bolts are out, gently pull the cylinder free. It may be stuck due to corrosion. A few sprays of penetrating lubricant can help. Use a rubber mallet to tap it loose if needed. Never force it. You could damage the fork tube or surrounding components.
Step 3: Remove the Old Lock Bolt
Inside the fork assembly, you will find the lock bolt. This is the metal piece that slides into the fork tube slot when the lock engages. Use needle-nose pliers to remove any clips or retainers holding it in place.
Clean the bolt area thoroughly with a rag and wire brush. Remove any old thread locker or corrosion buildup. This ensures your new parts install cleanly and function properly.
Step 4: Install the New Fork Lock Cylinder
Take your new fork lock cylinder and apply a thin layer of dielectric grease to the keyhole and internal pins. This protects against moisture and ensures smooth key operation.
Slide the new cylinder into the mounting position. Align it with the bolt hole and the fork tube slot. Insert the mounting bolts and tighten them firmly but do not overtighten. Use your thread locker compound on the bolt threads to prevent loosening from vibration.
Step 5: Install the New Lock Bolt
Insert the new lock bolt into the fork assembly. Make sure the slot on the bolt aligns with the cylinder’s locking pin. Secure any clips or retainers that hold the bolt in place.
Test the lock by inserting the key and turning it to the locked position. The steering should stop moving. Then turn the key to unlock and verify the steering moves freely. This test is critical before you ride.
Step 6: Reassemble and Test
Reinstall any panels or covers you removed earlier. Reconnect any electrical connectors if your lock cylinder has wiring for an alarm or immobilizer system.
Now for the fun part. Test the lock several times. Turn the key locked and unlocked. Check that the steering responds correctly in both positions. Take your Harley for a short, slow test ride in a safe area to confirm everything works perfectly.
Quick Tips for a Smooth Replacement
- Always work on a cool engine to avoid burns.
- Keep small parts in a labeled container or tray.
- Apply dielectric grease to the new cylinder before installation.
- Test the lock before every ride during the first week after replacement.
- Keep your old cylinder as a backup part.
Common Mistakes to Avoid During Fork Lock Replacement
Even with a great guide, mistakes happen. Here are the most common errors riders make during a fork lock replacement and how to avoid them.
Mistake 1: Skipping the Compatibility Check
Not all fork lock cylinders fit every Harley model. A cylinder from a 2010 Street Glide will not necessarily work on a 2020 Road King. Always check the part number against your owner’s manual before purchasing. Using the wrong cylinder can damage your steering mechanism and cost you more in repairs.
Mistake 2: Overtightening the Mounting Bolts
Tightening bolts too much can crack the cylinder housing or strip the threads in the steering head. Use a torque wrench if you have one. Hand-tight plus a quarter turn is usually sufficient for Harley-Davidson fork lock mounts.
Mistake 3: Forgetting to Test Before Riding
This is the most dangerous mistake. A lock that does not engage fully leaves your bike unprotected. Always test the lock in both positions before you ride. If the steering moves when locked, stop and recheck your installation.
Mistake 4: Ignoring Corrosion on the Fork Tube
When you remove the old lock cylinder, inspect the fork tube slot for rust or pitting. Corrosion here can prevent the new lock bolt from seating properly. Clean the area thoroughly and apply a rust inhibitor before installing the new parts.
Mistake 5: Using the Wrong Lubricant
Never use heavy grease inside the lock cylinder. It can gum up the pins and make the lock stiff. Stick with dielectric grease or a dedicated lock lubricant. These products are designed to keep cylinders operating smoothly without attracting dirt.
Maintaining Your New Fork Lock for Longevity
Replacing your fork lock is only half the battle. Proper maintenance keeps it working reliably for years. Here is how to care for your new lock cylinder and steering lock.
Regular Lubrication Schedule
Apply a small amount of lock lubricant to the keyhole every three months. This prevents internal pin wear and keeps the key turning smoothly. Before winter storage, give the cylinder a thorough lubrication. Cold weather can make existing minor issues much worse.
Visual Inspection Routine
Once a month, visually inspect your fork lock. Look for signs of rust, loose bolts, or key wobble. Catch small problems before they become big ones. A quick five-minute inspection can save you from an unexpected lock failure on the road.
Protecting Your Harley from Theft
A working fork lock is great, but adding extra motorcycle security layers is even better. Consider adding a disc lock, a steering clamp, or a GPS tracker. These Harley security accessories work together with your fork lock to create a comprehensive theft deterrent system.
When to Consider a Full Lock System Upgrade
If you own an older Harley, the original fork lock design may be outdated. Aftermarket ignition locks and steering locks offer improved security features. Some include alarm integration or keyless entry. Research options that match your riding style and security needs.
Replacing your fork lock is one of the simplest yet most impactful maintenance tasks you can do. A working lock protects your investment and gives you peace of mind every time you park your bike. With this Harley-Davidson Fork Lock Replacement Guide, you have everything you need to complete the job confidently.
Remember to take your time, follow each step carefully, and always test your work before riding. Your Harley deserves the best care, and a properly functioning fork lock is a big part of that. Now grab your tools and get to work. Your bike will thank you for it.
Frequently Asked Questions
How long does a fork lock replacement take?
Most riders complete the entire fork lock replacement in 30 to 60 minutes. If you are new to motorcycle maintenance, give yourself an extra 15 to 20 minutes to get comfortable with the process. The more you do it, the faster you will become.
Can I use an aftermarket fork lock cylinder on my Harley-Davidson?
Yes, aftermarket cylinders work well as long as you match the correct part number to your model. Aftermarket options from reputable brands offer reliable performance at a lower price point than OEM parts. Just double-check compatibility before purchasing.
How much does it cost to replace a Harley-Davidson fork lock?
The total cost typically ranges from $30 to $80 for the parts alone. If you take it to a shop, labor adds $50 to $100 depending on your location. Doing it yourself saves you the labor cost and gives you the satisfaction of completing the repair on your own.
What happens if my fork lock breaks while riding?
A broken fork lock while riding is rare but possible. It usually means the lock bolt has worn down or snapped. If this happens, your steering will still work, but the lock mechanism will no longer engage. Replace the lock immediately and avoid leaving your bike unattended in unsecured areas until the repair is complete.
Do I need to replace the key along with the cylinder?
Most replacement cylinders come with a new key set included. If you want to keep your original key, check with the manufacturer before ordering. Some aftermarket cylinders require a new key, while others can be re-keyed to match your existing key.
Can I prevent my fork lock from failing prematurely?
Absolutely. Regular lubrication, keeping the cylinder dry, and avoiding forced key turns all extend the life of your fork lock. A little maintenance goes a long way. Make it part of your regular bike care routine and your steering lock will last for many years.
Conclusion
Your Harley-Davidson Fork Lock Replacement Guide is now complete. You have learned what a fork lock does, how to spot when it needs replacing, and exactly how to swap it out yourself. This is a straightforward repair that anyone can do with basic tools and a little patience.
Taking care of your fork lock means taking care of your bike. It is a small part that plays a huge role in your motorcycle’s security and functionality. Do not wait until the lock fails completely. If you notice any of the warning signs we covered, act now.
Your Harley deserves the best. A fresh fork lock replacement is one of the easiest ways to keep it running strong and secure. Grab your tools, follow the steps, and enjoy the confidence that comes with a job well done. Ride safe and ride smart.