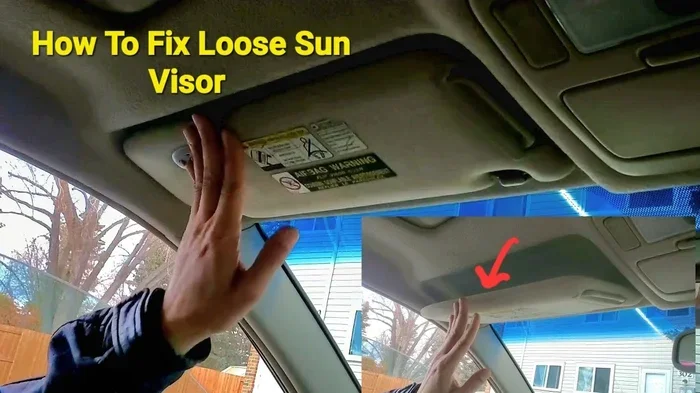
How Much Does It Really Cost to Replace a Car Visor
The car visor replacement cost typically ranges from $20 to $150 for parts alone, with labor adding $50 to $200 if you visit a shop. Replacing a sun visor yourself is one of the easiest DIY car repairs you can do, saving you significant money. Whether your visor clip is broken or the entire unit needs swapping, this guide covers everything you need to know.
Have you ever glanced up at your car’s sun visor and noticed it is hanging crooked, wobbling dangerously, or completely detached? You are not alone. A broken car visor is one of those small annoyances that quietly ruins your daily driving experience. Maybe it fell off while you were trying to block out the sun, or perhaps the clip just gave up after years of use. Whatever the reason, the question on your mind is probably simple: how much does it really cost to replace a car visor?
The good news is that replacing a car visor is one of the most affordable and straightforward repairs you can tackle. Car visor replacement cost varies depending on whether you go OEM or aftermarket, DIY or professional. Most drivers spend between $20 and $150 on parts alone. Add labor if you visit a shop, and you are still looking at a very manageable expense. This guide walks you through every angle of the cost, process, and options so you can make the best decision for your wallet and your time.
Key Takeaways
- OEM visors cost more: Dealer original parts typically run $50 to $150, while aftermarket options start as low as $10.
- DIY saves money: Most visor replacements take under 15 minutes and require no special tools.
- Insurance may help: Some policies cover non-accident visor repairs depending on your plan details.
- Hidden costs exist: clips, adhesive, and labor can add up if you are not careful.
- Timing matters: Waiting too long to fix a broken visor can lead to further interior damage.
- Aftermarket works well: Quality third-party visors perform just as well as factory parts at a fraction of the price.
📑 Table of Contents
- Understanding the Car Visor Replacement Cost
- Factors That Affect the Cost of Replacing a Car Visor
- How to Replace a Car Visor Yourself
- When to Seek Professional Help for Visor Replacement
- Can Insurance Cover the Cost of Visor Replacement?
- How Long Does a Car Visor Last Before Needing Replacement
- Common Mistakes People Make When Replacing a Car Visor
- Final Thoughts on Car Visor Replacement Cost
Understanding the Car Visor Replacement Cost
Before you dive into fixing that broken visor, it helps to understand what you are actually paying for. The car visor replacement cost is not a single fixed number. Several factors determine the final price, including the type of visor, your vehicle make and model, and whether you choose to do the work yourself or pay someone else.
Think of it like replacing a light switch at home. The part itself is cheap, but the total cost depends on whether you grab a basic replacement from the hardware store or hire an electrician. The same logic applies here. Let us break down the numbers so you know exactly what to expect.
OEM vs Aftermarket Visor Prices
When you replace a car visor, you generally have two paths: original equipment manufacturer (OEM) parts or aftermarket alternatives. OEM visors come directly from your car’s manufacturer or dealership. They match the original part exactly in fit, finish, and function. The downside is the price tag. OEM sun visor replacement typically costs between $50 and $150 for the part alone.
Aftermarket visors are made by third-party manufacturers. They come in a wide range of prices, from as low as $5 to around $50 for quality options. Many aftermarket visors look and work just as well as OEM parts. The main differences are cosmetic. You might notice slight variations in material quality or color matching, but functionally, they get the job done just fine.
Here is a quick comparison to help you visualize the difference:
- OEM visor part: $50 to $150. Perfect fit, full warranty, dealership sourced.
- Aftermarket visor part: $5 to $50. Good fit, no warranty, widely available online.
- Universal fit visor: $10 to $30. May require minor adjustments. Great budget option.
If your car is older or less common, OEM parts may be harder to find and more expensive. In those cases, aftermarket visors are often the smarter choice. You save money and still get a solid replacement that works perfectly.
Labor Costs for Visor Replacement
If you take your car to a dealership or independent mechanic, labor costs will add to your total car visor replacement cost. Most shops charge between $50 and $100 per hour. The good news is that visor replacement is a very quick job. A trained technician can usually swap out a visor in 15 to 30 minutes. That means labor should only add $15 to $50 to your bill.
However, some dealerships have minimum labor charges. This means even if the job takes 15 minutes, you might pay for a full hour. Always ask for an estimate before committing. You do not want to pay $100 in labor for a part that costs $15.
Factors That Affect the Cost of Replacing a Car Visor
The price tag on your visor replacement is not set in stone. Several variables can push the cost up or pull it down. Understanding these factors helps you make smart choices and avoid surprises at the checkout counter.
Your Vehicle Make and Model
Not all visors are created equal. Luxury vehicles, trucks, and SUVs often have more complex visor systems. Some come with built-in mirrors, LED vanity lights, or extended flip-down panels. These features increase the part cost significantly. For example, replacing a BMW sun visor with a built-in mirror and light can cost $100 to $200 for the OEM part alone. A basic sedan visor might be half that price.
On the flip side, economy cars and older models often have simpler visor designs. These are easier to replace and cheaper to buy. If you drive a common model like a Toyota Camry or Honda Civic, you will find plenty of affordable replacement options.
Damage Extent and Additional Repairs
Sometimes a broken visor is not just about the visor itself. The clip that holds it to the roof rail might be damaged. The mounting bracket could be cracked. Or the adhesive strip that secures the mirror component might have failed. Each of these additional issues adds to the overall car visor replacement cost.
Here are some common extras that can increase your bill:
- Replacement clips: $2 to $10 for a set.
- Adhesive strips: $5 to $15 for a pack.
- Mounting bracket repair: $10 to $30 if the bracket is cracked.
- Wiring repair (for illuminated visors): $20 to $50 if the mirror light wiring is damaged.
Before you authorize any work, ask the technician to inspect the entire visor assembly. Sometimes what looks like a simple visor problem turns out to be a clip or bracket issue. Catching these early saves you from a second repair visit.
Where You Get the Work Done
Where you choose to replace your visor has a huge impact on the final cost. Dealerships charge the most because they use OEM parts and charge premium labor rates. Independent mechanics are usually more affordable. And doing it yourself? That is the cheapest option by far.
Here is a rough breakdown of costs by location:
- Dealership: $100 to $250 total (parts plus labor).
- Independent mechanic: $50 to $150 total.
- DIY at home: $5 to $50 (parts only).
As you can see, the savings from a DIY approach are substantial. Even if you buy a quality aftermarket part, you still save at least half compared to a dealership visit.
How to Replace a Car Visor Yourself
Here is the part that makes this whole topic exciting. Replacing a car visor yourself is incredibly easy. You do not need to be a mechanic. You do not need special tools. Most people complete the job in under 15 minutes. If you have ever changed a light bulb or swapped out a battery, you have the skills needed for this task.
What You Will Need
Before you start, gather these items. You probably already have them at home:
- Replacement visor (OEM or aftermarket, sized for your vehicle).
- Screwdriver (usually a small Phillips head).
- Pliers (for removing old clips if needed).
- Adhesive strips or clips (often included with the new visor).
You do not need anything fancy. This is not a job that requires a specialized tool kit or a trip to the auto parts store for exotic equipment. A basic screwdriver and maybe a pair of pliers is all you need.
Step-by-Step Replacement Process
Follow these steps and you will have your new visor installed in no time:
- Remove the old visor: Flip the visor down and look for the screw or clip holding it to the roof rail. Use your screwdriver or pliers to remove it. Gently pull the visor away from the mount.
- Inspect the mount: Check the roof rail bracket for damage. If the clip or bracket is broken, you will need to replace that too. This is a small part but crucial for a secure fit.
- Install the new visor: Align the new visor with the mount. Insert the screw or click the clip back into place. Make sure it feels snug and secure.
- Test the visor: Flip it up and down a few times. Check that it stays in place and does not wobble. If it feels loose, double-check the clip or screw tightness.
- Check the mirror and light (if applicable): If your visor has a mirror or built-in light, make sure those still work after the swap.
That is it. Five simple steps and you are done. No waiting for appointments, no paying for labor, and no hassle. If you have ever replaced windshield wipers or swapped out a cabin air filter, this job is even easier.
Tips for a Smooth DIY Replacement
Here are some practical tips that make the process even smoother. First, take a photo of the old visor before you remove it. This gives you a reference for how everything is connected. Second, keep all screws and clips in a small bowl so you do not lose them. Third, if your new visor has a built-in mirror, test the mirror light before you fully mount it. It is much easier to troubleshoot wiring issues before everything is secured in place.
When to Seek Professional Help for Visor Replacement
DIY visor replacement works great for most drivers. But there are situations where professional help makes more sense. Knowing when to call in the experts saves you time, frustration, and potentially more expensive mistakes.
Complex Visor Systems
Some vehicles have advanced visor systems that go beyond a simple flip-down sun shield. Luxury cars, for instance, may have visors with LED vanity lights, extended mirrors, or even integrated cameras. These complex systems require more careful handling. If you are not comfortable working with wiring or delicate components, it is worth paying a professional to handle the job.
Warranty Considerations
If your car is still under warranty, check the terms before attempting a DIY replacement. Some manufacturers require dealer-installed parts to keep the warranty valid. Replacing a visor yourself with an aftermarket part could potentially void coverage for related components. When in doubt, call your dealer and ask. It costs nothing to make the call, and it protects you from expensive surprises down the road.
Multiple Broken Components
If your visor is not the only thing broken, you might want to let a professional handle everything at once. For example, if the visor clip is damaged and the roof rail is also showing signs of wear, a mechanic can address both issues in a single visit. Spreading repairs across multiple trips usually costs more in the long run.
Can Insurance Cover the Cost of Visor Replacement?
Many drivers wonder if their car insurance will foot the bill for a visor replacement. The short answer is: it depends. Most standard auto insurance policies do not cover cosmetic or wear-and-tear damage. A broken visor from normal use typically falls into this category.
However, there are exceptions. If your visor was damaged in an accident, collision coverage might apply. If the visor was broken by vandalism or a falling object, comprehensive coverage could help. And some policies include non-accident repair coverage for specific components. It is always worth checking with your insurance provider before assuming the worst.
If you are curious about what your policy covers, you might want to read up on what car insurance covers for non-accident repairs. This gives you a better picture of when your policy might actually help with small repairs like visor replacements.
Also, keep in mind that filing a claim for a small repair like a visor replacement might not be worth it. Your deductible could exceed the cost of the repair itself. In most cases, paying out of pocket for a visor replacement is the smarter financial move.
How Long Does a Car Visor Last Before Needing Replacement
Car visors are built to last, but they do not last forever. On average, a car visor lasts 10 to 15 years with normal use. However, several factors can shorten that lifespan significantly.
Drivers in sunny climates often experience visor degradation faster. UV rays weaken the plastic over time, making it brittle and prone to cracking. Frequent use also wears out the hinges and clips. If you flip your visor up and down every day, the moving parts will eventually loosen.
Here are some signs that your visor needs replacing soon:
- The visor wobbles or falls down when flipped up.
- The mirror inside the visor is cracked or foggy.
- The clip or hinge feels loose even after tightening.
- The visor arm is bent or broken.
- The built-in light flickers or does not turn on.
Catching these signs early helps you plan for a replacement before the visor completely fails. A loose visor might seem harmless, but while driving, it can become a distraction. A visor that blocks your view when flipped up is a safety concern, not just an annoyance.
Common Mistakes People Make When Replacing a Car Visor
Even simple repairs come with pitfalls. Avoiding these common mistakes saves you time, money, and headaches.
Buying the Wrong Size Visor
Not all visors fit all cars. Visor dimensions vary between manufacturers and even between model years. Before you order a replacement, double-check your vehicle’s make, model, and year. Many online sellers provide compatibility charts. Take the old visor with you to the store if you are buying in person. A wrong-sized visor means wasted money and wasted time.
Forgetting to Replace the Clip or Bracket
Sometimes the visor itself is fine, but the clip or bracket that holds it is broken. If you only replace the visor without fixing the mount, the new visor will have the same problem. Always inspect the entire mounting system before you buy parts. A set of replacement clips costs just a few dollars and prevents a frustrating repeat repair.
Over-Tightening Screws
It might seem like a good idea to crank down the screws as tight as possible. Resist that urge. Over-tightening can crack the plastic mount or strip the threads. Hand-tighten until the visor feels secure, then give it just a quarter turn more. That is all you need.
Ignoring Wiring for Illuminated Visors
If your visor has a mirror light, there is a small wiring harness behind it. When removing the old visor, disconnect the wiring carefully. When installing the new one, reconnect it firmly. A loose connection means the light will not work, and you will be back to troubleshooting when you thought the job was done.
Final Thoughts on Car Visor Replacement Cost
The car visor replacement cost is one of the most affordable repairs you will ever face. Whether you choose OEM or aftermarket parts, DIY or professional installation, the total expense is usually well under $200. Most drivers can handle the job themselves for under $50 in parts, and the entire process takes less than half an hour.
Do not let a broken visor linger and become a bigger distraction or safety issue. The fix is quick, cheap, and satisfying. Once you replace that visor and feel it snap securely into place, you will wonder why you waited so long to fix it.
If you are dealing with other small car repairs, remember that many common issues are simpler and cheaper to fix than most people think. Knowledge is your best tool. The more you understand about your vehicle, the more money you save and the more confident you become behind the wheel.
Take care of the small things, and your car will take care of you for years to come. A functioning visor might seem like a minor detail, but it is one of those things you do not notice until it is broken. And once it is fixed, you will never think about it again. That is the beauty of a quick, affordable repair done right.
Frequently Asked Questions
How much does it cost to replace a car visor at a dealership?
Replacing a car visor at a dealership typically costs between $100 and $250, depending on your vehicle model and whether you use OEM parts. Labor charges range from $50 to $100, and the part itself can run $50 to $150 for original equipment. Always ask for a detailed estimate before authorizing any work.
Can I replace my car visor with an aftermarket part?
Yes, aftermarket visors are a great budget-friendly option that cost between $5 and $50. They fit most vehicles well and perform just as effectively as OEM parts. The main differences are cosmetic, such as slight variations in color or material finish.
How long does it take to replace a car visor?
A DIY visor replacement takes about 10 to 15 minutes for most vehicles. Professional installation at a shop typically takes 15 to 30 minutes. The job is quick because visors attach with simple clips or screws and require no complex wiring in most cases.
Does car insurance cover visor replacement?
Standard insurance policies usually do not cover visor damage from normal wear and tear. However, if the damage resulted from an accident, vandalism, or a covered event, your policy might help. Check with your provider and review your specific coverage details before filing a claim.
What tools do I need to replace a car visor myself?
You only need a basic screwdriver, usually a small Phillips head, and possibly a pair of pliers. No special tools are required. If you have ever changed windshield wipers, you already have the skills needed for this simple repair.
How do I know if my car visor needs replacing or just repairing?
If the visor clip is broken but the visor body is intact, you might only need a replacement clip costing $2 to $10. However, if the visor arm is cracked, the hinge is damaged, or the plastic is brittle, a full replacement is the better option. Inspect the entire unit before deciding.